Oral

Description:

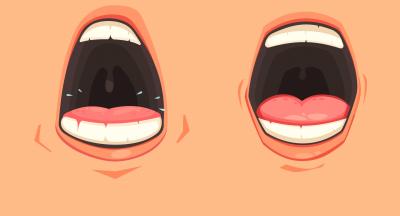
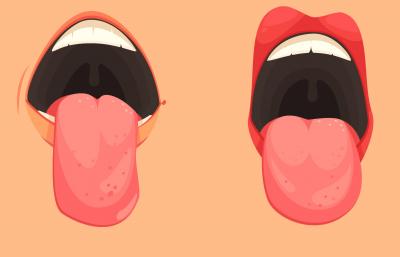
Oral sensory problems arise due to how the muscles in the mouth function. These problems have to do with the act of eating and the way in which mouth tissues perceive sensory information of the foods that are being consumed. Some of the ways in which oral sensory problems can be seen is through: slow and inefficient chewing, gagging, vomiting, weakness in cheeks, strong reactions to certain foods and textures and coughing or choking.

Purpose

Oral sensory activities are important for learners with oral sensory problems because they can help decrease existing harmful coping mechanisms. It is also important to practice such activities to ensure that oral sensory problems slowly decrease.

Filter By

gums
Activity 1: Gum Massage

Accept oral stimulation over a large surface in and around the oral cavity

Purpose

This activity helps the learner normalize awareness within the oral cavity in order to improve speech and feeding development. Also helpful to decrease drooling, mouth stuffing, and/or the need to chew objects.

  • Step 1

    Place your index finger just above the learner’s upper front teeth. Slide it along the gums to the back right molars and back to where you began. Repeat about 3 times. Then repeat the same motion on the lower gums.

  • Step 2

    Use your thumb to repeat the same movement on the other side of the learner’s mouth. Start above the upper middle teeth and move your thumb along the gums to the back left molar area. Repeat about 3 times. Then repeat the same motion on the lower gums.

  • Step 3

    During each step, notice the learner’s response and adjust accordingly. Try adding more/less pressure and observe the learner’s response. For a learner who is hyposensitive, try dipping your finger in ice water before beginning gum massage.

    *You may repeat this exercise several times throughout the day, as often as possible.

    **If the learner does not allow any gum massage at all, you may start on the cheeks or on the jawline, moving from the sides of the face towards the mouth.

sail
Activity 2: Sailboat Races

Caregivers will take paper boats and sail it in a tub/bucket. The learner will blow on the boat with a straw in order to move it forward.

Purpose

This activity will help to improve stamina for speech production and feeding.

  • Step 1

    Create 2-4 paper sailboats and fill up a tub or bucket with water.

  • Step 2

    Model blowing the sailboat across the water. Then instruct the learner to do so.

  • Step 3

    Repeat until satisfied.

blow paint
Activity 3: Blow Painting

Use a straw to move paint on a paper.

Purpose

This activity will cause the oral muscles to get stimulated. Learners will also develop concentration.

  • Step 1

    Splash some paint on a large piece of paper – make sure the consistency is more watery

  • Step 2

    Find a straw that you can use.

  • Step 3

    Blow through the straw at the paint and watch the paint move around the paper.

cotton
Activity 4: Cotton Ball Fun

Use some cotton balls, straw and a tape or colors to set up a maze on the floor. Blow cotton balls with a straw along the path treated on the floor/table.

Purpose

This activity helps improve stamina and breath support for speech production and feeding.

  • Step 1

    Create a maze or a football goal on any table using masking tape or markers. You can also just use paper cups or any objects to create a maze

  • Step 2

    Get a cotton ball or you can crumple up a piece of paper into a ball-shape. Model blowing and show the learner how to blow the cotton ball forward and make it move.

  • Step 3

    Now have the learner blow the cotton ball towards the “goal” or through the maze.

jaw
Activity 5: Oral Motor Exercises for the Jaw

Imitate a variety or oral-motor exercises.

Purpose

This activity helps the learner refine jaw movements and in turn coordinate with the lips, and tongue for speech production and managing developmentally appropriate textures for feeding.

  • Step 1

    Tug-of-war with licorice. Place a long, stick-shaped piece of licorice or a whole, peeled carrot on the learner’s molars and instruct them to bite down. Then playfully pull on it as learner clenches their jaw like a tiger or puppy (the learner can pull on the licorice while you clench too).

  • Step 2

    Have the learner imitate you: a) Open mouth wide, b) Move jaw from closed to open to closed, c) Open mouth partially then close it.

lips
Activity 6: Oral Motor Exercises for the Lips

Imitate a variety or oral-motor exercises in front of a mirror.

Purpose

This activity helps the learner refine lip movements and in turn coordinate with the jaw, and tongue for speech production and managing developmentally appropriate textures for feeding.

  • Step 1

    Tightly seal lips to say “mmmmmmm.”

  • Step 2

    Put on “lipstick” or chapstick with purees (ranch dressing, applesauce) and pucker to make kisses on the table or on a mirror. Learner can also lick puree off lips using tongue only.

  • Step 3

    Have the learner really round their lips and then push the lips back for a gentle smile.

  • Step 4

    Pick a nursery song that the learner likes and try humming it together.

mouth
Activity 7: Oral Motor Exercises for the Tongue

Imitate a variety or oral-motor exercises in front of a mirror.

Purpose

This activity helps the learner refine and strengthen tongue movements and in turn coordinate with the jaw, and lips for speech production and managing developmentally appropriate textures for feeding.

  • Step 1

    Have the learner say “lalalalala” without moving their jaw up/down or side to side. Rest and repeat.

  • Step 2

    Practice tongue tip sounds. Say “t-t-t-t-t-t,” “n-n-n-n-n-n,” and “d-d-d-d-d-d.” For a challenge try a combination of these sounds, such as “t-d-n.”

  • Step 3

    Practice licking food (something sticky like peanut butter, ketchup, jam) out of a bowl like a puppy.

  • Step 4

    Paint tongue with a dark coloured sucker (try to paint the back of the tongue if he/she can tolerate it)

  • Step 5

    Count teeth with your tongue.

straws
Activity 8: Drinking through a straw

Use a straw to drink water, juice or any other liquid from a glass.

*Disclaimer: Caution with food allergies and the learner’s oral motor skills as these foods may be a choking hazard in some cases. This activity should be done under constant supervision.

Purpose

This activity uses the sucking motion while drinking from a straw to provide strong sensory input which may be calming for the learner. It provides good foundation for eating and speech skills

  • Step 1

    Cut a regular straw in half. A shorter straw is easier to handle and takes less strength for the learner to suck liquid up from.

  • Step 2

    Dip the straw into a liquid that the learner enjoys (i.e., juice, ice water). Place the tip of your index finger over the top of the straw to keep the liquid in the straw. Remove the straw from the cup, keeping the top of the straw covered with your fingertip.

  • Step 3

    Place the straw on the learner's lips, slightly tilted down (so that if you release your finger, the liquid will flow into the mouth).

  • Step 4

    Remove your fingertip, allowing the liquid to flow into the learner’s mouth. The goal here is for the learner to comprehend that they are getting liquid from the straw.

  • Step 5

    Once the learner understands the idea of getting liquid from a straw, instruct them to close their lips around the straw. When the lips are closed around the straw, release your fingertip for the liquid to come out. Pinching the lips together may help.

  • Step 6

    Once the learner is able to close their lips around the straw with ease, it is time to work on sucking liquid from the straw. Place the straw just inside the mouth without releasing your fingertip from the top of the straw. When a sucking response is initiated, release the liquid. Quickly repeat so the learner understands the idea of continuous sipping.

  • Step 7

    As an extension, experiment with thicker textures like milkshakes and even applesauce to make sucking more challenging.